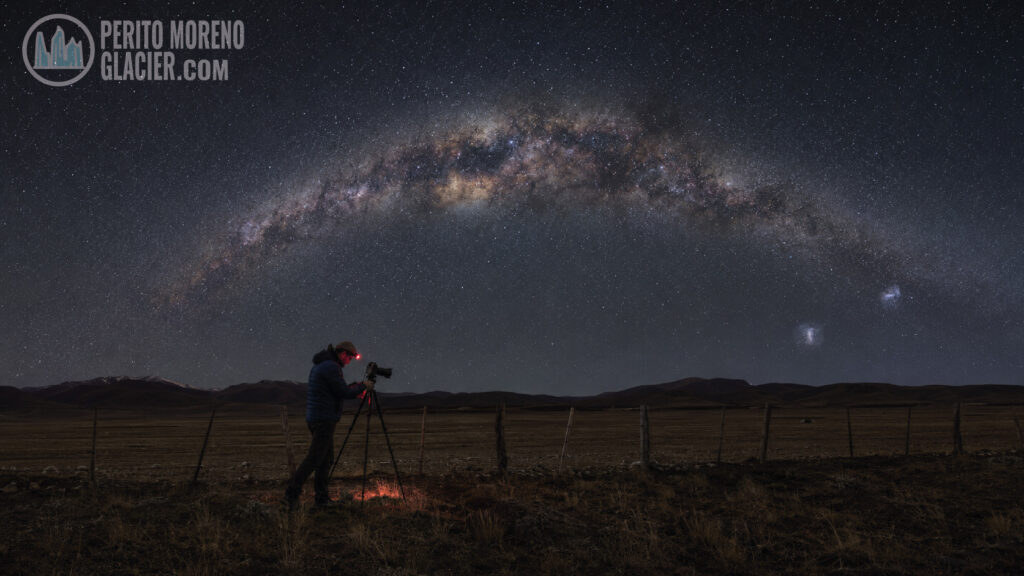
Photographing the southern Milky Way near El Calafate is less about finding one “secret spot” than matching four variables: a dark and lawful location, a moonless time window, the Galactic Center’s position and weather stable enough for a sharp exposure. The southern sky can place the bright galactic region high and prominently, but Patagonia adds its own complications—wind, cold, rapidly changing cloud and very long summer twilight.
This is a field guide for making the photograph, not a general introduction to stargazing. If you first need help with seasons, constellations and night-tour options, begin with Stargazing in El Calafate: A Guide to the Patagonian Night Sky, then return here to build a shooting plan.
I never promise a particular image before seeing the sky. I plan a primary composition, a safer backup close to shelter and a non-photographic evening if cloud or wind wins. That mindset is especially useful in southern Patagonia.
Plan the Galactic Center, not only the weather
The Milky Way is present throughout the year, but its brightest central region changes position and visibility during the night and across the seasons. An attractive photograph requires it to be above the horizon during true darkness and in a direction that works with your foreground.
Simulate the sky for your exact date and location
Use a planetarium tool such as Stellarium and enter the location, date and local time. Check:
- when astronomical darkness begins and ends;
- when the Galactic Center rises, reaches a useful angle and sets;
- its compass direction at the planned shooting time;
- moon phase, moonrise, moonset and angular position;
- whether the Milky Way will appear vertical, diagonal or arched over the scene.
Do not reuse a screenshot from another month. At El Calafate’s latitude, summer nights can have limited full darkness, while colder months provide longer nights but harsher conditions. Late-summer-through-spring sessions often offer useful Galactic Center opportunities, yet the workable hour changes continuously. Run the simulation for the actual trip.
Treat moonlight as a design choice
For maximum contrast in the Milky Way, work near a new moon or during hours when the moon is below the horizon. A small amount of moonlight can illuminate the steppe and reduce the need for artificial foreground light, but it can also wash out faint galactic structure.
Check moonrise and moonset, not only the percentage shown by an app. A bright moon below the horizon may not affect the frame; a thinner moon placed near the Galactic Center can matter more than its percentage suggests.
Both Sides of Southern Patagonia: El Calafate & Puerto Natales
Wonderful 6-night program to combine El Calafate and Perito Moreno Glacier with Puerto Natales and Torres del Paine National Park
Choose a safe and lawful foreground near El Calafate
Darkness alone does not make a location suitable. You need legal access, stable ground, a safe place to park and a route you can recognize without crossing private land.
Scout in daylight
Visit the site before sunset and record:
- the exact parking position;
- gates, fences and private-property boundaries;
- holes, loose stones, water edges and steep drops;
- vehicle headlights or buildings likely to enter the frame;
- the foreground direction relative to the planned Milky Way position;
- a safe exit if weather deteriorates.
Ask the landowner or accommodation for explicit permission when the site is private. Do not stop on a blind bend or walk onto open-looking land simply because there is no sign.
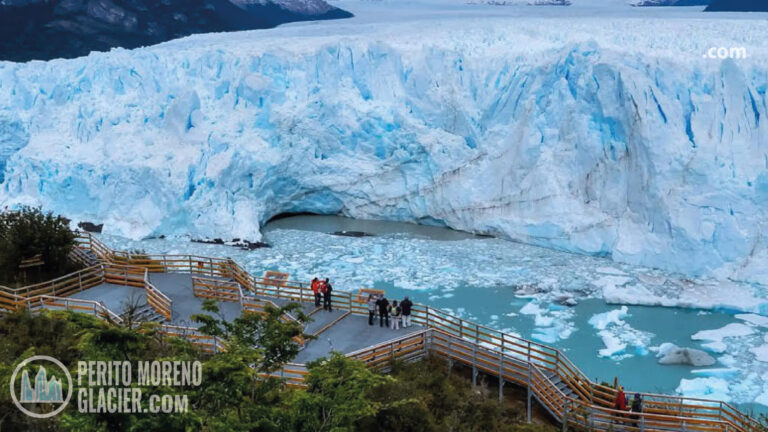
Do not plan an after-hours glacier session
Perito Moreno Glacier is inside Los Glaciares National Park, which has visitor hours and protected-area rules. The road, walkways and forest are not an informal all-night photography set. Build the astrophotography session around a lawful location near El Calafate, a rural accommodation or a guided night activity with confirmed access.
That also gives the image a more honest local identity. A line of steppe grass, a weathered fence, a lone tree or the silhouette of distant hills can communicate Patagonia without pretending the glacier is available at midnight.
Build the composition before it becomes dark
A technically clean sky is not yet a strong travel photograph. The foreground must give the viewer scale, direction or a sense of place.
Start with one visual relationship
Decide what the Milky Way is doing in the frame:
- rising behind a single subject;
- forming a diagonal that continues a road or fence line;
- arching across a wide panorama;
- balancing a lit window or small human figure;
- reflecting in still water where access and wind allow.
Avoid adding several foreground ideas at once. At night, simple shapes read better than clutter.
Leave room for the final crop
Shoot wider than the intended output. Lens correction, horizon leveling, panorama stitching and social-media crops all remove pixels at the edges. Take a horizontal master frame, then deliberately make a vertical composition if you need one; do not assume a 16:9 image can be cropped into every format without losing the Galactic Center.
Amazing Patagonia: Ushuaia, El Calafate & Torres del Paine National Park
Book this amazing tour including Ushuaia, El Calafate, and the unique Torres del Paine National Park
A reliable single-exposure starting workflow
There is no universal camera setting. Focal length, sensor resolution, aperture, sky brightness, wind and desired print size all affect the result. Use the following as a starting process and judge the stars at 100% magnification.
Set the camera manually
For a full-frame camera with a fast wide-angle lens, begin around:
- manual exposure;
- widest useful aperture, often f/1.8 to f/2.8;
- 10 to 20 seconds, shortened for longer focal lengths or higher-resolution sensors;
- ISO 1600 to 6400 depending on sensor, aperture and sky;
- RAW file format;
- fixed white balance for consistent previews, around 3,500–4,200 K as a neutral starting range;
- long-exposure noise reduction off when shooting stacks, because it creates a dark-frame delay after every exposure.
These are test values, not a recipe. Make one frame, enlarge a star near the corner and shorten the shutter if it has become a dash. The popular “500 rule” can be too generous for modern high-resolution cameras; field inspection or an NPF-style calculator is more dependable.
Focus on a star, then protect the focus ring
Autofocus often fails in darkness. Use live view, enlarge a bright star, turn the focus ring manually until the point is smallest and check again after the lens has cooled. A small piece of removable tape can prevent accidental movement, but do not force a focus ring or cover a control you still need.
Infinity marks are approximate. Temperature and lens design mean the best star focus may sit slightly away from the printed symbol.
Separate the sky and foreground when the scene demands it
A foreground can need more light or depth of field than the sky. Photographing both with one fast, short exposure may leave the land noisy and soft.
A two-exposure blend
Without moving the tripod, make the sky exposure first. Then make a longer, lower-ISO frame for the foreground, or photograph it during blue hour from exactly the same position. The final blend should preserve the real alignment and time relationship of the scene.
Disclose the method when context matters. A blue-hour foreground combined with a later sky is a composite, not a single exposure. That does not make it invalid, but transparency protects the viewer’s trust.
Focus stacking for a close foreground
If an object is near the lens, one frame focused on the stars may not keep it sharp. Capture a second foreground frame focused closer and blend carefully. Watch grass, branches and water: movement between exposures creates difficult edges.
Stacking, panoramas and trackers
Advanced techniques solve different problems. Choose one because the composition needs it, not because more files automatically make a better photograph.
Stack multiple sky frames to reduce noise
Capture 8–20 identical sky exposures without moving the composition. Specialized software aligns the stars and averages random noise. Take the foreground separately because star alignment will shift the land.
Leave enough interval for the camera to write files without creating large gaps. Review the first and last frame for dew, focus drift and passing headlights before packing up.
Photograph a Milky Way arch as a panorama
Level the tripod, switch every setting to manual and overlap adjacent frames generously—roughly one third is a sensible field starting point. Sweep in an orderly direction and make a second row if the arch and foreground do not fit. A portrait-oriented camera provides more vertical coverage in each panorama panel.
Shoot the sequence quickly enough that the stars do not move dramatically between the first and last panels. Make a complete backup sweep before changing exposure.
Use a star tracker only with a clear blend plan
A tracker follows the sky, allowing a longer or lower-ISO exposure, but it blurs the stationary foreground. Capture a separate untracked foreground and mask the horizon precisely. Trackers also add weight, setup time and polar-alignment complexity in wind.
For a short Patagonia trip, a stable tripod and a good stack can be more reliable than learning a tracker in the field.
Control Patagonian wind without creating vibration
Extend the thickest tripod sections first and keep the center column down. Remove the camera strap or secure it so it cannot flap. Do not hang a heavy bag where it can swing; if ballast is needed, let it touch the ground while applying gentle downward tension.
Stand to the windward side without touching the tripod during the exposure. Use a remote release or two-second timer. If gusts remain visible, shorten the shutter and raise ISO rather than returning with a series of blurred files.
Batteries, frost and condensation
Cold reduces battery performance. Carry charged spares inside an inner pocket and rotate them. A battery that appears empty outside may recover some charge when warmed.
Condensation often forms when cold equipment is brought into warm, humid air. Before entering the vehicle or accommodation, place the camera and lens in a closed bag so they warm gradually. If the front element begins to fog outdoors, a proper low-power lens heater is safer than repeatedly wiping the glass.
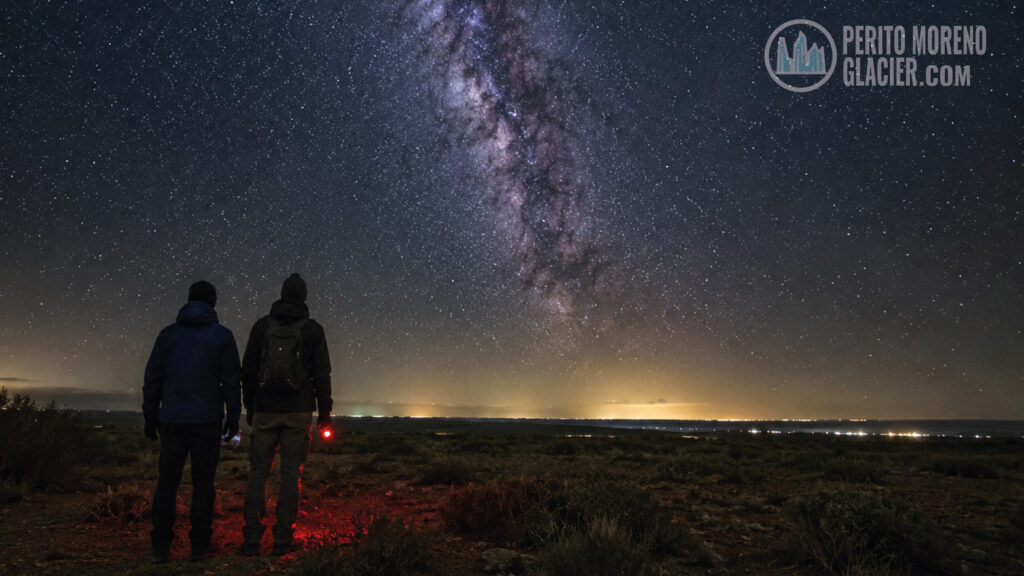
Bring a red headlamp for setup, but switch every light off during exposures and warn nearby photographers before turning it on. Red light still affects an image and can disturb night vision at close range.
Review the files before leaving
Check more than the rear-screen thumbnail:
- focus at the center and corners;
- star shape and tripod vibration;
- histogram without relying on screen brightness;
- clipped highlights from buildings or vehicles;
- dew or frost on the lens;
- panorama overlap;
- one clean foreground frame;
- at least one backup composition.
The most painful astrophotography mistake is often visible in the first file but repeated for an hour because nobody zoomed in.
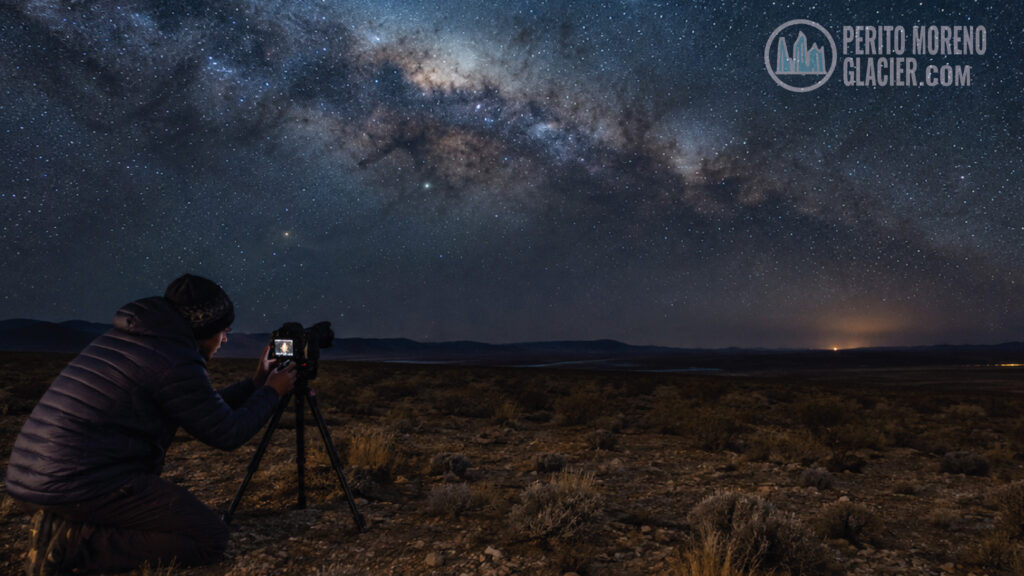
Edit for a believable southern night
Begin with lens correction, white balance and moderate contrast. Reduce color noise before sharpening the stars. Use local adjustments on the Galactic Center carefully; an aggressive clarity or dehaze setting creates dark halos and brittle-looking dust lanes.
NASA’s night-sky guidance reminds viewers that long exposures record more color and structure than human eyes see directly. That is normal. The goal is not to make the file look like an unaided view, but it should still feel internally consistent: shadows should match the light source, the horizon should not glow unnaturally and stars should not have fluorescent color.
Keep the RAW files and layered edit. They preserve your choices and make it possible to produce a different crop later without rebuilding the session.
My final field sequence
When conditions cooperate, I use this order:
- Scout and frame the foreground in daylight.
- Confirm access, wind and safe parking.
- Photograph a clean foreground during blue hour if needed.
- Recheck the sky position and moon timing.
- Focus on a star and make a short high-ISO test.
- Inspect star shape at 100%.
- Capture the primary sky sequence.
- Make the panorama or alternate composition.
- Check for dew, focus drift and missing frames.
- Pack the cold camera in a closed bag before returning indoors.
If you would rather photograph with local logistical support, contact us and ask specifically about lawful night access, transport and current astrophotography options. Clear skies cannot be guaranteed, but the plan can be sound.
Perito Moreno Glacier & Pristine Luxury Camp – 4 Nights
A wonderful 4-night program to visit Perito Moreno Glacier from El Calafate and finalizing with a glamping experience!
El Calafate, Perito Moreno & Estancia Nibepo Aike – 4 Nights
A wonderful 4-night program to visit Perito Moreno, navigate the Lake Argentino and staying in a typical Patagonian Ranch!